Create an Integration
Welcome#
This guide walks you through the process of creating an integration for Cortex XSOAR. This tutorial assumes you have a working instance of Cortex XSOAR and programming experience with Python.
Note: As an introductory guide, not all code in the tutorial strictly follows our code conventions. Please see
Code Conventions to learn more about our coding standards.
The Cortex XSOAR IDE#
You have the option to develop integrations using the Cortex XSOAR IDE or a standalone IDE such as Visual Studio (if you use Visual Studio, refer to the Cortex XSOAR extension for Visual Studio Code). For this tutorial, we use the Cortex XSOAR IDE, which includes access to Script Helper (a library of many common server functions within Cortex XSOAR), as well as a graphical user interface for editing integration settings, commands, and arguments.
CommonServerPython & CommonServerUserPython#
The CommonServerPython (CSP) and CommonServerUserPython (CSUP) scripts are implicitly imported at the beginning of every Python script in Cortex XSOAR. CSP is imported first, enabling you to create your own common methods in CSUP to use across scripts and integrations. Note that CSP and CSUP can’t be attached to integrations you create, so any changes you implement are not available for other users.
Script Helper#
In many cases, there is already an existing script for common server functions. With the Script Helper, you can easily find tools to format a table, manipulate data, post to the war room, etc. If a function you want to create seems like it could be used in many different scripts, there’s a good chance it already exists in Script Helper. If you do create a new function that you believe would be useful across many scripts, we encourage you to contribute that function to CommonServerPython scripts.
Navigate to BYOI (Bring Your Own Integration)#
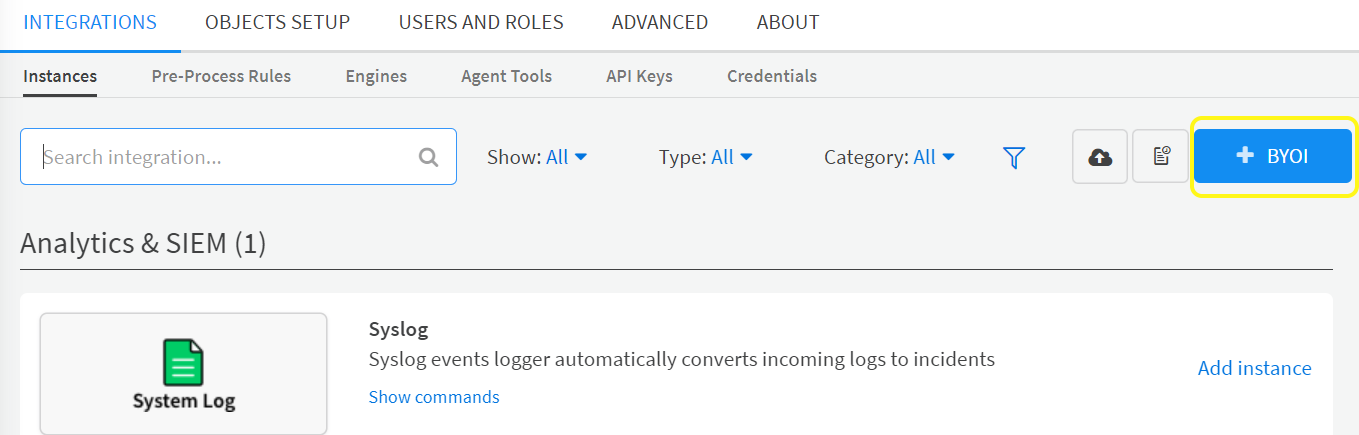
Go to Settings > Integrations. Click the blue button BYOI in the top right corner, and the built-in Cortex XSOAR IDE will open. If you don’t see this button, it means you don’t have the correct permissions required for creating new integrations. Please reach out to your admin for assistance.
Define Integration Settings#
As an example, we are going to create an English to Yoda translator, which translates normal English into the way Yoda, the Star Wars character, speaks. This is a simple integration that lets us explore important aspects of integration development. With our integration, we can try calling an API, parsing data, and posting it to the war room. We will use the Yoda-Speak translate API available at FunTranslations.
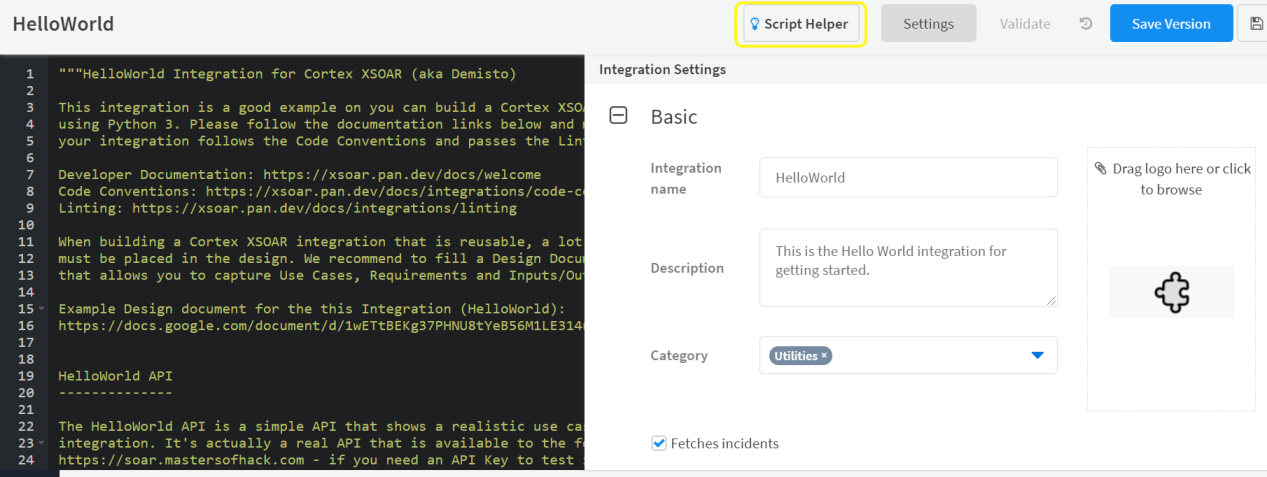
When you click on the BYOI button, you enter the Cortex XSOAR IDE. By default, the HelloWorld integration template is loaded. We will replace the default HelloWorld integration with our Yoda Speak integration.
To begin, replace the HelloWorld integration name with Yoda Speak. For the next part of this tutorial, you will replace the existing HelloWorld integration settings with our new Yoda Speak settings and delete unused parameters or arguments.
Behind the scenes, the settings you enter here are saved in a YAML file, which you can export and import. To learn more about Cortex XSOAR Integration YAML files, see Integrations and Scripts Metadata YAML File.
Basic Integration Settings#
In the Basic section, we name the integration, add a description, choose a category, and set several additional options.
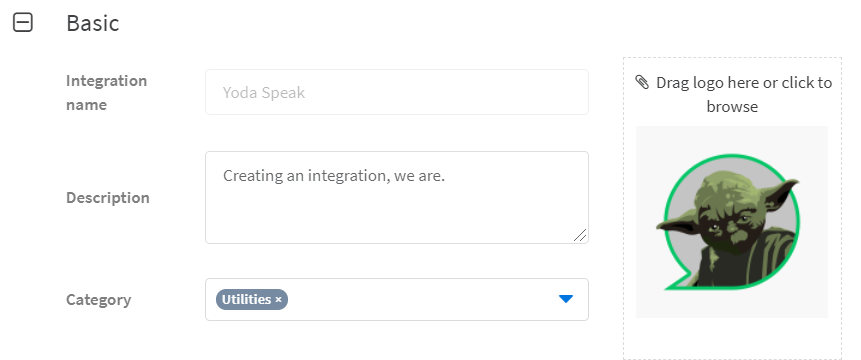
- Integration Name - Our integration will be called Yoda Speak.
- Description - The description would normally include basic information about the integration, common troubleshooting steps, and any required setup instructions. For the purposes of this tutorial, however, let's enter Creating an Integration, we are.
- Category - Select Utilities for the category. See full list of available categories.
- Logo - The logo should be no larger than 10KB, have a transparent background, and be in PNG format. You can drag and drop the logo here, or click the box to open the file browser and select the file for upload.
Note: The Fetches incidents checkbox tells Cortex XSOAR that the integration runs periodically to ingest events and create incidents in Cortex XSOAR. Our Yoda Speak integration does not need to fetch incidents, so make sure this checkbox is empty. While we don’t need this feature for our Yoda Speak integration, fetching incidents is an essential part of many integrations. There are additional options available here - external schema support, can sync mirror in, can sync mirror out, and long running integration, but these are less commonly used.
Parameters#
The next section lets you set parameters that can be used across all commands in the integration. Some common parameters include the API key used for communicating with the product, your username, whether to use proxy, etc.
For the Yoda Speak integration, we want to include the API key and proxy settings, and to allow for insecure requests. We also include a URL parameter, which tells the integration where to send requests. For each parameter, we include a display name that tells the user what the value is used for.
Enter the following values for the apikey parameter:
| API Key Parameter Settings | |
|---|---|
| Parameter name | apikey |
| Type dropdown | Authentication |
| Mandatory | not selected |
| Display password | API Key |
For the Yoda Speak integration, the free service does not require an API key, and allows up to 60 API calls a day with up to 5 calls an hour. If you require more API calls, FunTranslations offers a paid service that you can access with an API key. In this case, we provide the option for users with a paid subscription to enter their API key, but we don’t make it mandatory. The Authentication parameter type enables you to use Cortex XSOAR’s built-in credential management system to save and use the API key, and ensures that the API key is not displayed to the user and is not stored in logs.
Note: Many integrations that connect to third party services require an API key for authentication, which is sent with every request to the third party service. Since it’s used by every command that performs an API call, we add it as a global parameter and not an argument.

Enter the following values for the url parameter:
| URL Parameter Settings | |
|---|---|
| Parameter name | url |
| Type dropdown | Short Text |
| Mandatory | selected ✓ |
| Initial value | https://api.funtranslations.com/translate/ |
| Display name | API URL |
Note: In some cases, the URL parameter may be used for third party services that allow you to connect to more than one server, such as servers in different geographic regions, for example https://login.example.de or https://login.example.com.

Enter the following values for the insecure parameter:
| Insecure Parameter Settings | |
|---|---|
| Parameter name | insecure |
| Type dropdown | Boolean |
| Initial value | false |
| Display name | Trust any certificate (not secure) |
When Trust any certificate is set to True, the integration ignores TLS/SSL certificate validation errors. Use this to test connection issues or connect to a service while ignoring SSL certificate validity. We do not recommend setting this option to true in a production environment.

Enter the following values for the proxy parameter:
| Proxy Parameter Settings | |
|---|---|
| Parameter name | proxy |
| Type dropdown | Boolean |
| Initial value | false |
| Display name | Use system proxy settings |
When Use system proxy settings is set to True, the , integration runs using the proxy server (HTTP or HTTPS) defined in the server configuration. In most cases, a proxy is not required.

Command Settings#
We are now ready to add a command. Before we start coding, we can configure the command in the Integration Settings.
- Click +Add command.
- For Command name, enter yoda-speak-translate.
- For the description, enter Translates a text from English to Yoda.

Note: Command names should follow “brand-function” name formatting convention. For example, VirusTotal has a command that adds a comment to a scan, named vt-comments-add. An exception to this rule is that when creating commands that enrich indicators, the commands should be named according to the indicator: !ip, !domain, etc. This naming convention allows commands from multiple integrations to be run together to enrich an indicator. For example, running !ip ip=8.8.8.8 can trigger multiple integrations that gather information about the IP address. For more information, see Generic Reputation Commands.
Arguments
We want to translate English text to Yoda-style text, so we add an argument called text. Users can provide a different text string on every call. The argument is mandatory, since the command can’t run if there’s nothing to translate.

Note: Unlike parameters, arguments are specific to each command.
Outputs
In Cortex XSOAR, the context is a JSON object that is created for each incident and stores results from integration commands and automation scripts. Context is important because it enables you to add information to an incident and run playbooks and integrations utilizing that information.
To write the translation to context, we can add an output to the yoda-speak-translate command. The naming convention for the context path is Brandname.Object.Property, so we will add YodaSpeak.TheForce.Translation as the context path. For a description, enter Translation this is. Select type String.

Integration Code#
Once we've finished adding our parameters, command, argument, and outputs, we can write the integration code.
NOTE: The sample code uses standard Python error handling mechanisms, such as try. For more information about errors and exceptions in Python, see the Python documentation. In our integration code, we raise exceptions when errors occur. The convention is to have a main try/except block on main(), that catches errors and calls return_error.
The return_error function ensures that playbooks calling these functions will fail and stop, alerting the user to a problem. In integrations and automations, we refrain from calling return_error in other places in the code.
Import#
To begin, we have the option to import Python libraries, so that their commands are available for our integration. Every integration runs inside a Docker image, and our standard Docker image includes most of the common packages, such as JSON and collections. In our Yoda Speak integration, we don’t need to import any libraries, as it only uses the BaseClient class, implicitly imported from CommonServerPython.
NOTE: When working within a traditional IDE, such as PyCharm, Visual Studio Code, etc., we recommend importing the following at the top of your code, for debugging purposes.
If you want to use Python libraries that are not included in the standard Cortex XSOAR Docker image, you can create a customized Docker image.
Disable Secure Warnings#
Next we prevent Python from raising a warning when accessing resources insecurely.
Since we created the insecure parameter that allows the integration to ignore TLS/SSL certificate validation errors, we also need to disable the warning.
Create the Class Client#
The Client is an object that communicates with the API. We create a class called Client. When a Client object is created, it instantiates a parent BaseClient using the params we have set up (whether to use proxy, whether to allow insecure connections, and the base URL). If the user provided values to the api_key parameter, the Client sets the headers it will use accordingly.
Note: When using the Yoda Speak API with an API key, the API key is passed as a header.
The number of methods our Client class has usually matches the number of commands in our integration. The Yoda Speak integration only has the translation command, so our Client object should have a matching method to the API request which returns its result.
Create the test_module#
The test_module function is run whenever the Test integration button is clicked in the integration instance settings. The test_module function sends a hardcoded preset string (here, it’s I have the high ground) to the Yoda-Speak translate API to test API connectivity and authentication. There are three possible results:
- HTTP response code is 200, which means the request is successful. We return the string ok per the convention for a successful test.
- The request is not successful and the problem is related to authorization: Authorization Error: make sure API Key is correctly set.
- The request is not successful for any other reason: The error text is displayed.
Create the Translate Command#
The translate_command function uses the client that is provided as an argument for the function and it calls translate using the text provided. The client is created outside of the function (in main()). The function performs several steps.
- Confirms that there is a non-empty string to translate. If the string input is empty, it raises an exception.
- Tells the Client to send the appropriate API call. If the translation fails (due to an API rate limit, authentication or connection error, etc.), an exception is raised.
- If the translation succeeds, we want to return it to Cortex XSOAR. To do that, we use a class called CommandResult (which is declared in CSP). We supply it with the following arguments:
- outputs: We create a dictionary called outputs where both the original text and the translation are stored.
- outputs_prefix: The first level of the output in the context data. It usually matches the name of the integration or service.
- raw_response: The argument used to attach the raw response received from the service, which can be useful when debugging unexpected behaviors.
- outputs_key_field: Since we can run the translation command multiple times, and possibly receive different results for the same string of text, the system needs to know where to update or append each result. In this example we tell the system that Phrase.Original is the key that represents the original text we translated, so that the next time the command is run on the same string of text, the translated values will update. Learn more about storing results as context data.
- readable_output: This is what users see in their War Room when calling the command, so it should be formatted. We can use the tableToMarkdown function (from CSP) to turn the JSON into a user-friendly table. We provide tableToMarkdown with both the JSON values and a title for the table. Note: The Script Helper provides an easy way to insert common functions into your code. If you click on the Script Helper button and search for the tableToMarkdown command, you have the option to insert it directly into the code with placeholders for its name (title) and t (JSON) arguments.
Create the Main Function#
Everything actually runs within main. We pull in the integration parameters, arguments, and the translate command. The parameters are assigned to variables. Notice that the parameters are the same ones we set up in the integration settings earlier.
When the function runs, the command will be logged for debugging purposes.
We now create a Client using the given parameters. The Client is defined.
There are two possible commands that can be passed to the main function in our integration.
test-module If the command name is test-module, it means the user has clicked the integration test button while setting up or editing an integration instance. NOTE: We did not explicitly create a command called test-module. It is a built-in command.
When returning **ok**, the user is shown a green **Success** message. If any value other than **ok** is returned, an error is displayed. Make sure you return errors that help the user understand what to change in the integration settings in order to fix connection issues.yoda-speak-translate This is the primary command for our integration and lets us translate strings of text.
There is also an else option - this returns an error if someone tries to run a command that was created in the YAML file but does not exist in the Python (PY) file. For example, if you added a command yoda-interpret in the integration settings, but did not add it to this file, and then tried to run that command, you would see Yoda-interpret is not implemented.
Log Errors#
If any errors occur during the execution of our code, show those errors to the user and also return an error.
Start at Main#
This line tells the system where to start running our code. By convention, we call the main function main.
Test the Integration#
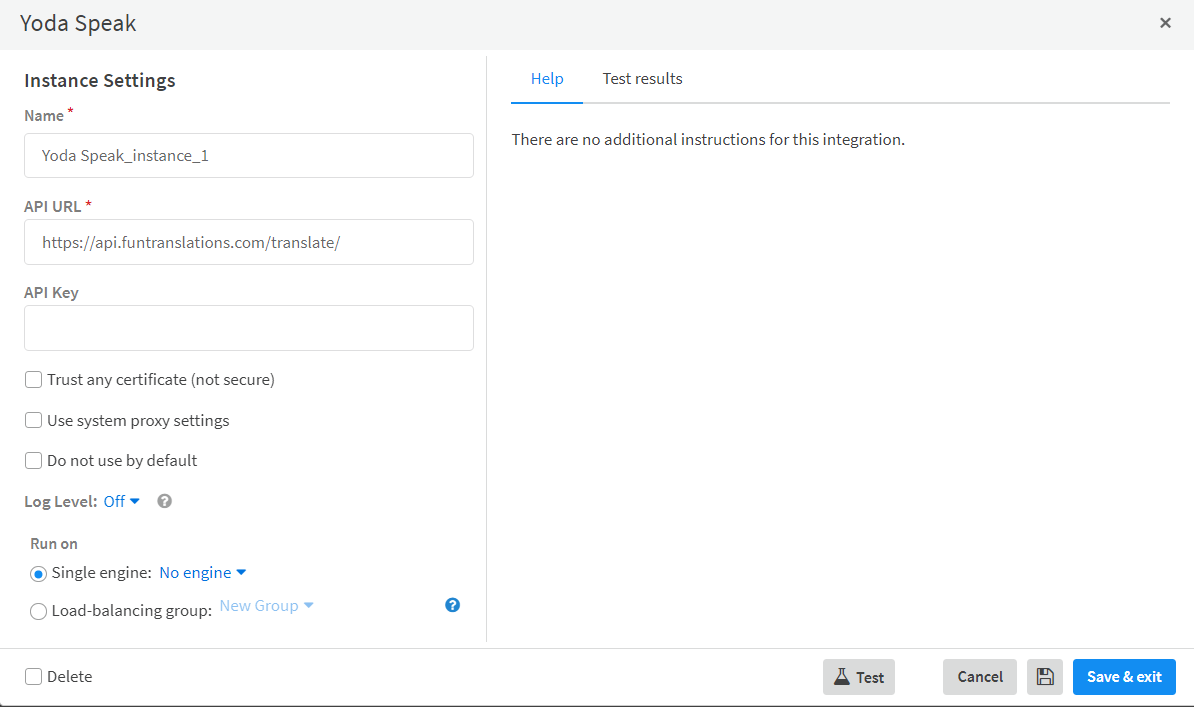
Go to Settings > Integrations, and search for Yoda. Click on Add instance.

We will not enter an API key, but will instead use the free option with a limited number of API calls. To test connectivity, click on the Test button. If the connection is successful, you will see Success and the date/time displayed. Click Save & Exit.
NOTE: If you have an integration open in two different tabs, you may encounter an error where your changes aren’t saved. In this case, take a screenshot of your changes, close both tabs, and then reopen one tab. Enter your changes again and save.
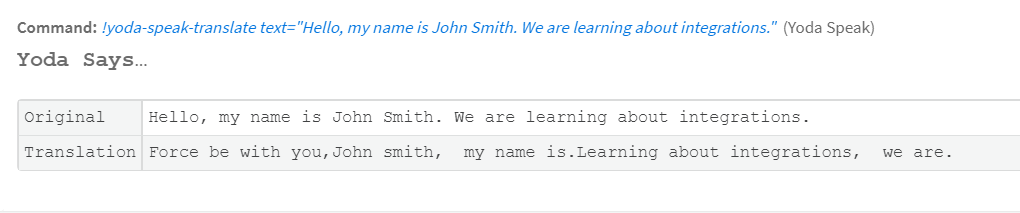
To test the integration, create a new incident. At the CLI, enter !yoda-speak-translate and the argument Hello, my name is John Smith. We are learning about integrations. (or any other string in English, of course!)

In the War Room, you can see the table we created with the tableToMarkdown function, with the results.
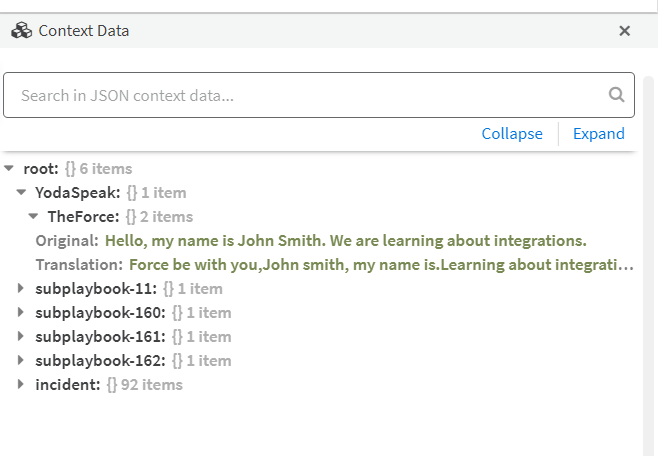
Let’s view the same translation in the context.
YodaSpeak is the root for The Force. If the translation changes the next time we run the command, the translation field will be updated.
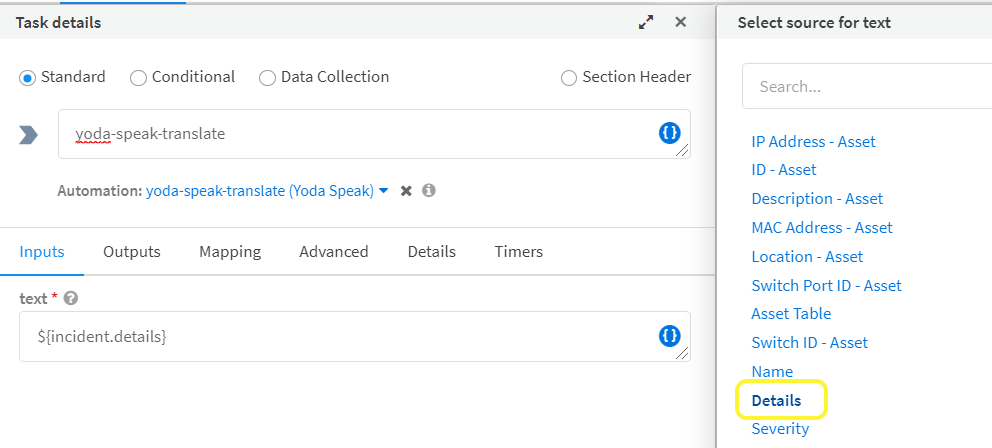
You can see the real power of integrations when you include them in a playbook. Go to the Playbooks page and click +New Playbook. We’ll name it Yoda Speak, and the playbook will translate the details field in an incident into Yoda Speak. In the task library, search for yoda and click Add. You can see there is a field for text, which is a required argument. While we could just type our text here, we instead want to pull that string from incident details. Click on the curly brackets, then Incident details, Details. Click OK.
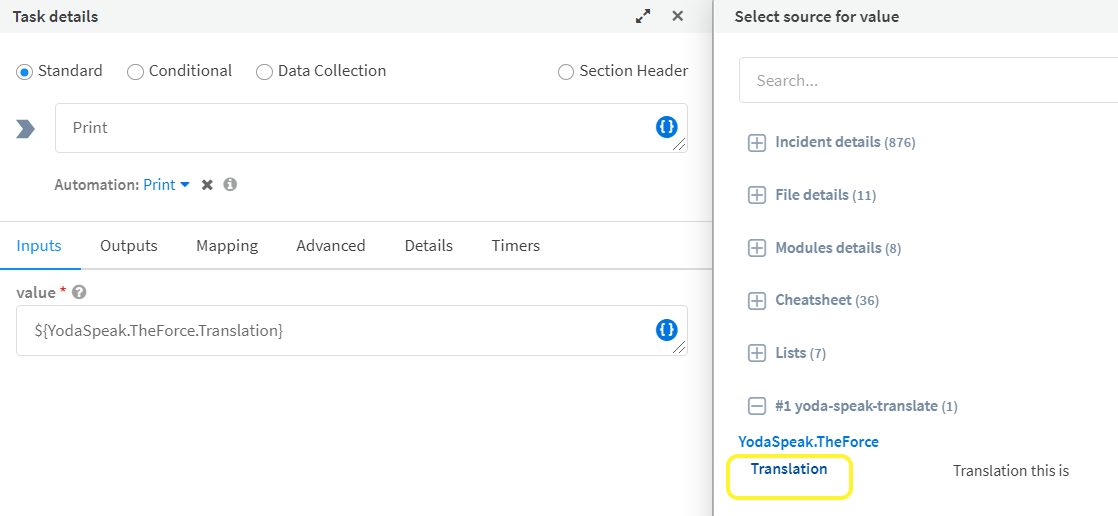
To print the translation to the War Room, we add a print task. In the task library, search for print and add the Print task found under utilities. Once again, we want to pull our text from the incident, so click on the curly brackets. Our options now include yoda-speak-translate. Under yoda-speak-translate, choose Translation and click OK.
We will now connect the tasks in our playbook. Use your cursor to create lines between Playbook Triggered and yoda-speak-translate and between yoda-speak-translate and Print.
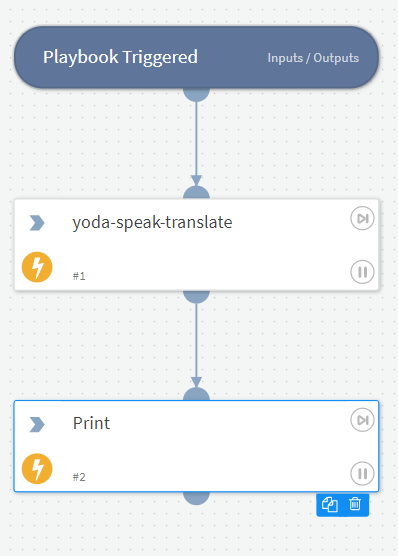
Save the playbook.
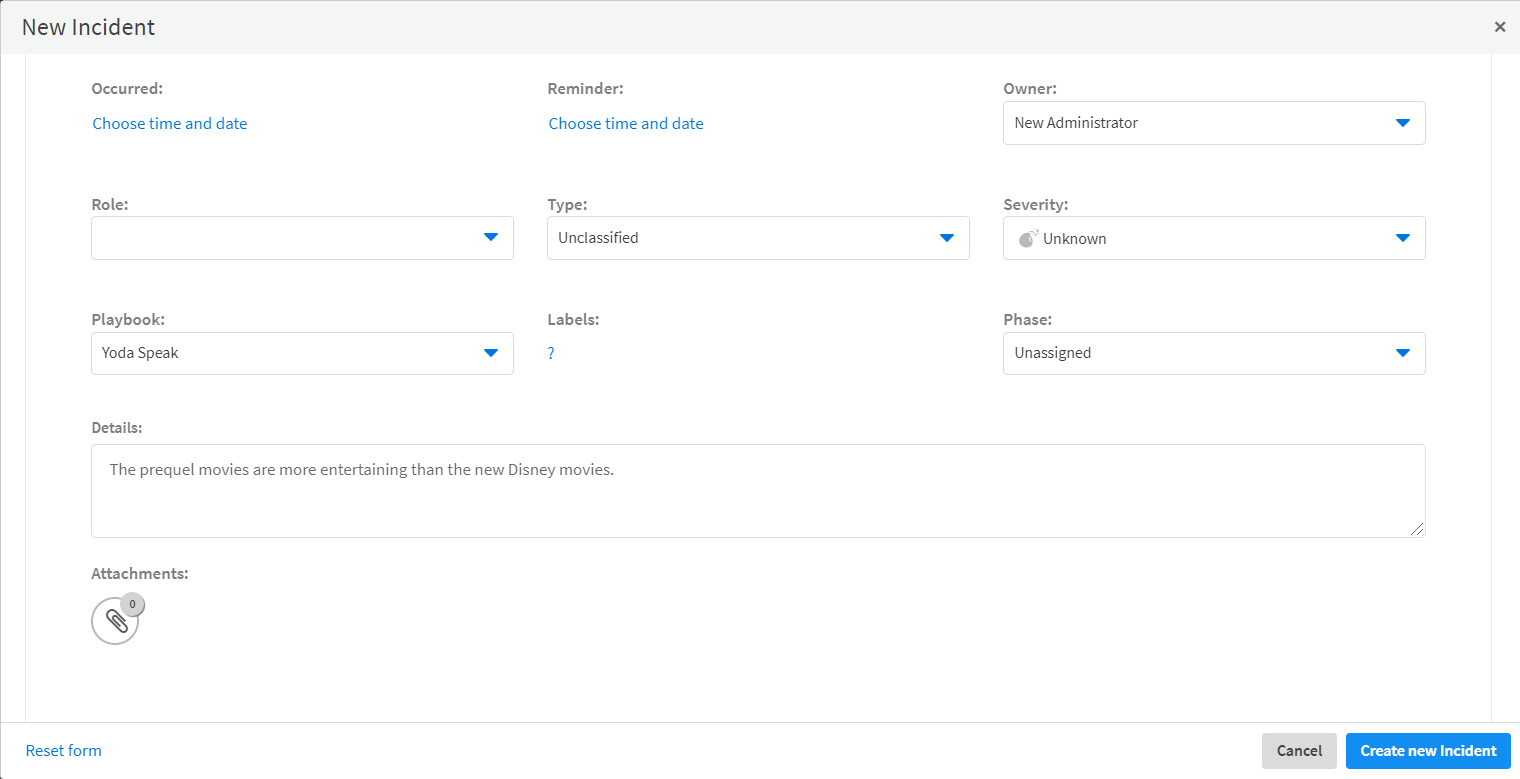
To test our new playbook, go to the Incidents page and create a new incident. In the details section, enter the text for translation: The prequel movies are more entertaining than the new Disney movies. Assign the Yoda Speak playbook, and click Create new incident.
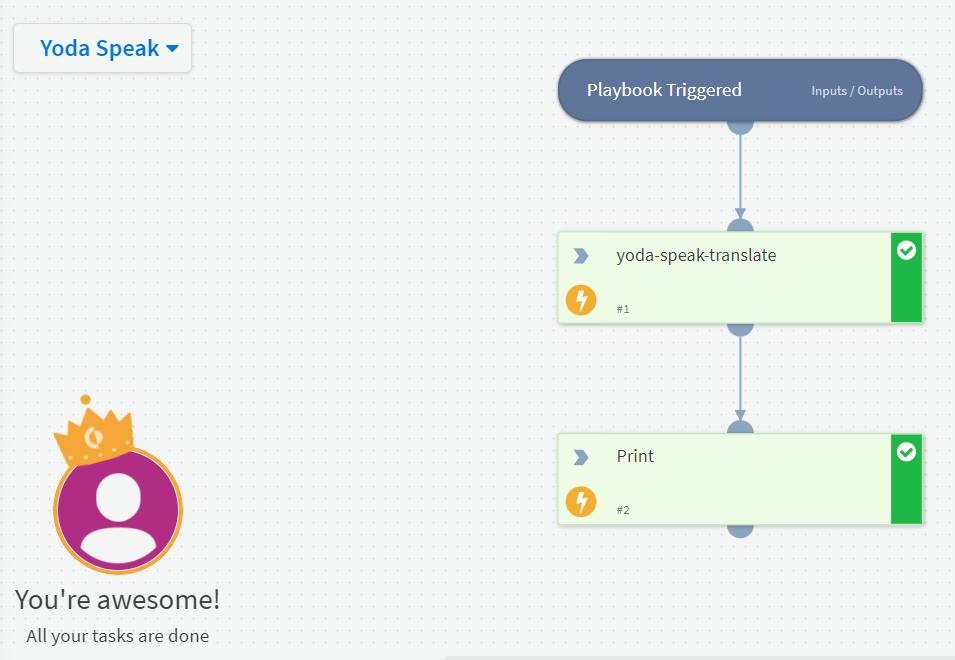
Now select the incident we just created from the incident list. Go to the Work Plan page and you can see that our playbook executed successfully.
We’re Done!#
Our example integration is now complete, and we can use it throughout Cortex XSOAR.
Real world integrations are usually more complex than our example. Like any code, integrations require maintenance and can be extended over time with new features, commands etc.
To ensure integrations perform as expected, packs can have unit tests, as well as test playbooks. Learn more about contributing content.
Resources#
The YodaSpeak Pack is available on GitHub. The pack contains the standard pack file structure and can be viewed as a resource when creating new integrations.