Test Playbooks
note
By default, Test Playbooks will not run in the CI for packs that are not supported by Cortex XSOAR. Hence, adding a test playbook as described in this article is not required, unless specifically requested by Cortex XSOAR.
We use Test Playbooks to test our integrations and automation scripts. The Test Playbooks provide full End to End testing. For testing small units of code, use Unit Testing. Tests are run using our CI framework. They are run both as part of the build process and on a nightly basis.
A Test Playbook consists of several steps, including testing commands, verifying the results, and closing the investigation.
We use a standard naming convention for our playbook tests which follows the format below:
Integration_Name_Test
Auto-Generate a Test Playbook#
To auto generate a Test playbook based upon an integration or script use the following demisto-sdk generate-test-playbook command which can be found here. You can then import the playbook and modify it to your needs.
Manually Create a Test Playbook#
- Navigate to Playbooks and click New Playbook.
- Define a Playbook name.
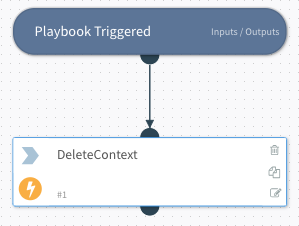
Add DeleteContext#
When creating a Test Playbook, it is often recommended for the first step to be DeleteContext. "Delete Context" does just that, it deletes all of the context data. While not always vital, it ensures that a test playbook has a clean beginning to test from without conflicting data. Especially, useful while developing and you wish to re-run the playbook. This allows for a test to be "sterile" and can help us to eliminate unrelated issues from the test.
- In the search field, type deletecontext and click Utilities.
- In the DeleteContext task, click Add.
- From the dropdown menu in the all field, select yes.
- Click OK and connect the Playbook Triggered task to the DeleteContext task.
Testing a Command, Verifying the Results, and Closing an Investigation#
It's important to test as many commands of the integration as possible as tasks, and each command should have a task. For this example we will look at the integration IPInfo, which accepts only one command called !ip.
Test a Command#
- Navigate to Playbooks and click New Playbook.
- In the search field, type ipinfo and click ip.
- In the ip task, click Add to edit the configuration options.
- Select an entity that will produce the most consistent results in the ip field, such as 8.8.8.8, the Google DNS server.
- Click OK to save your changes.
- Finally, connect the starting DeleteContext task to the ip task.

Verify the Command Results#
After you build the command, verify that you have received the results that you expect:
- Open the Task Library and select Create Task.
- Configure the new task.
| Configuration | Action |
|---|---|
| Conditional | Select the Conditional button to display the condition options. |
| Task Name | Type a task name. |
| From previous tasks | Click {} to display the Select source for tool. The Select source for tool displays the #2 ip task that you created. |
| 2 ip | Click to display the ip task configurations. |
| IP | Click Address and click Close. The IP.Address is displayed in the From previous tasks field. This is the Context Path. |
| From previous tasks | Wrap the Context Path using this format ${IP.Address}. Wrapping the Context Path tells Cortex XSOAR to retrieve the value located in the curly brackets. |
| As value | Type 8.8.8.8 and click ✅. |
Note: If you need to edit the value in a field, you can click on the value and edit it. For example, click on the value in the From previous tasks field and edit the ${IP.Address} value.
- Optional: If you need to filter or format the result, click Filters and Operations located in the Select source for dialog box.
- Click Save.
- Connect the ip task to the Verify Command Results task.
Close the Investigation#
- Navigate to Playbooks and click New Playbook.
- In the search field, type closeinvestigation and click BuiltIn Commands.
- For closeInvestigation, click Add.
- Click the {} in the id field.
- Click Incident details and find ID.
${incident.id}is inserted into the id field. - Click Close and click OK.
- Connect the Verify Command Results task to the closeInvestigation task.
- Choose the yes label name for the condition and click Save.
Naming and Exporting the Playbook#
Cortex XSOAR uses a standard naming convention for playbook tests that follows this format: Integration_Name_Test.
- Click Save Version.
- Exit the playbook editor.
- Export the playbook by clicking
 .
.
Adding the Playbook to your Project#
- Save your newly created test playbook to the
TestPlaybooksdirectory in your pack. - In the playbook YAML file that you created, edit the
idso that it is identical to thenamefield. - Modify the value in the
versionfield to -1 to prevent user changes. - Using the example above, the top of your YAML should look like this:
Adding Tests to conf.json#
In order to associate integrations with a test plabyook we mange a conf.json file (at the root of the repository). The conf.json file is located in the Tests directory.
The following is an example of a correct conf.json entry for an integration:
The following table describes the fields:
| Name | Description |
|---|---|
| integrations | The ID of the integration that you are testing. |
| playbookID | The ID of the test playbook that you are running. |
| timeout | The time in seconds to extend the timeout to (optional). |
| nightly | Boolean that indicates if the test should be part of only the nightly tests (optional). |