Cortex XSOAR IDE
Cortex XSOAR offers a built-in platform IDE which is available through the product's web UI.
Pro Tip
We recommend to try out the Visual Studio Code extension. It simplifies third-party integration and script development by enabling users to author Python content for Cortex XSOAR directly in Visual Studio COde. Highly recommended for developing Python Unit Tests.
It is important to take a moment and familiarize yourself with the Cortex XSOAR IDE as it may work differently than other IDEs you are familiar with. Some key differences between the Cortex XSOAR IDE and, for example Visual Studio Code, is the absence of an interpreter.
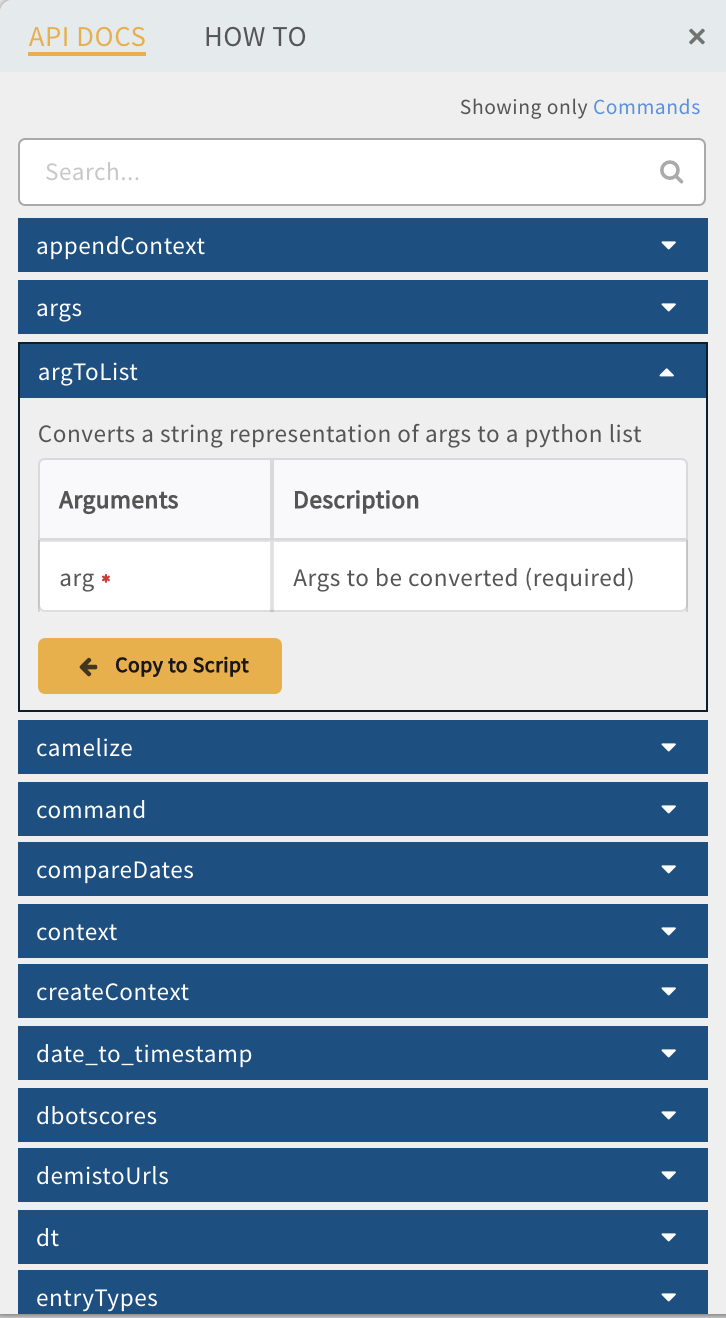
The Script Helper#
Cortex XSOAR is equipped with a script helper which is accessible via the button below:

The script helper will open up a flyout menu which presents all of the functions that are part of the common server. If you are trying to accomplish something that may seem trivial, check the script helper as a function for it may already exist.
The Settings Menu#
The settings menu contains configurations for Basic Settings, Parameters, Detailed Instructions, Commands and Script settings. Clicking the Settings button will open a flyout menu as seen below:
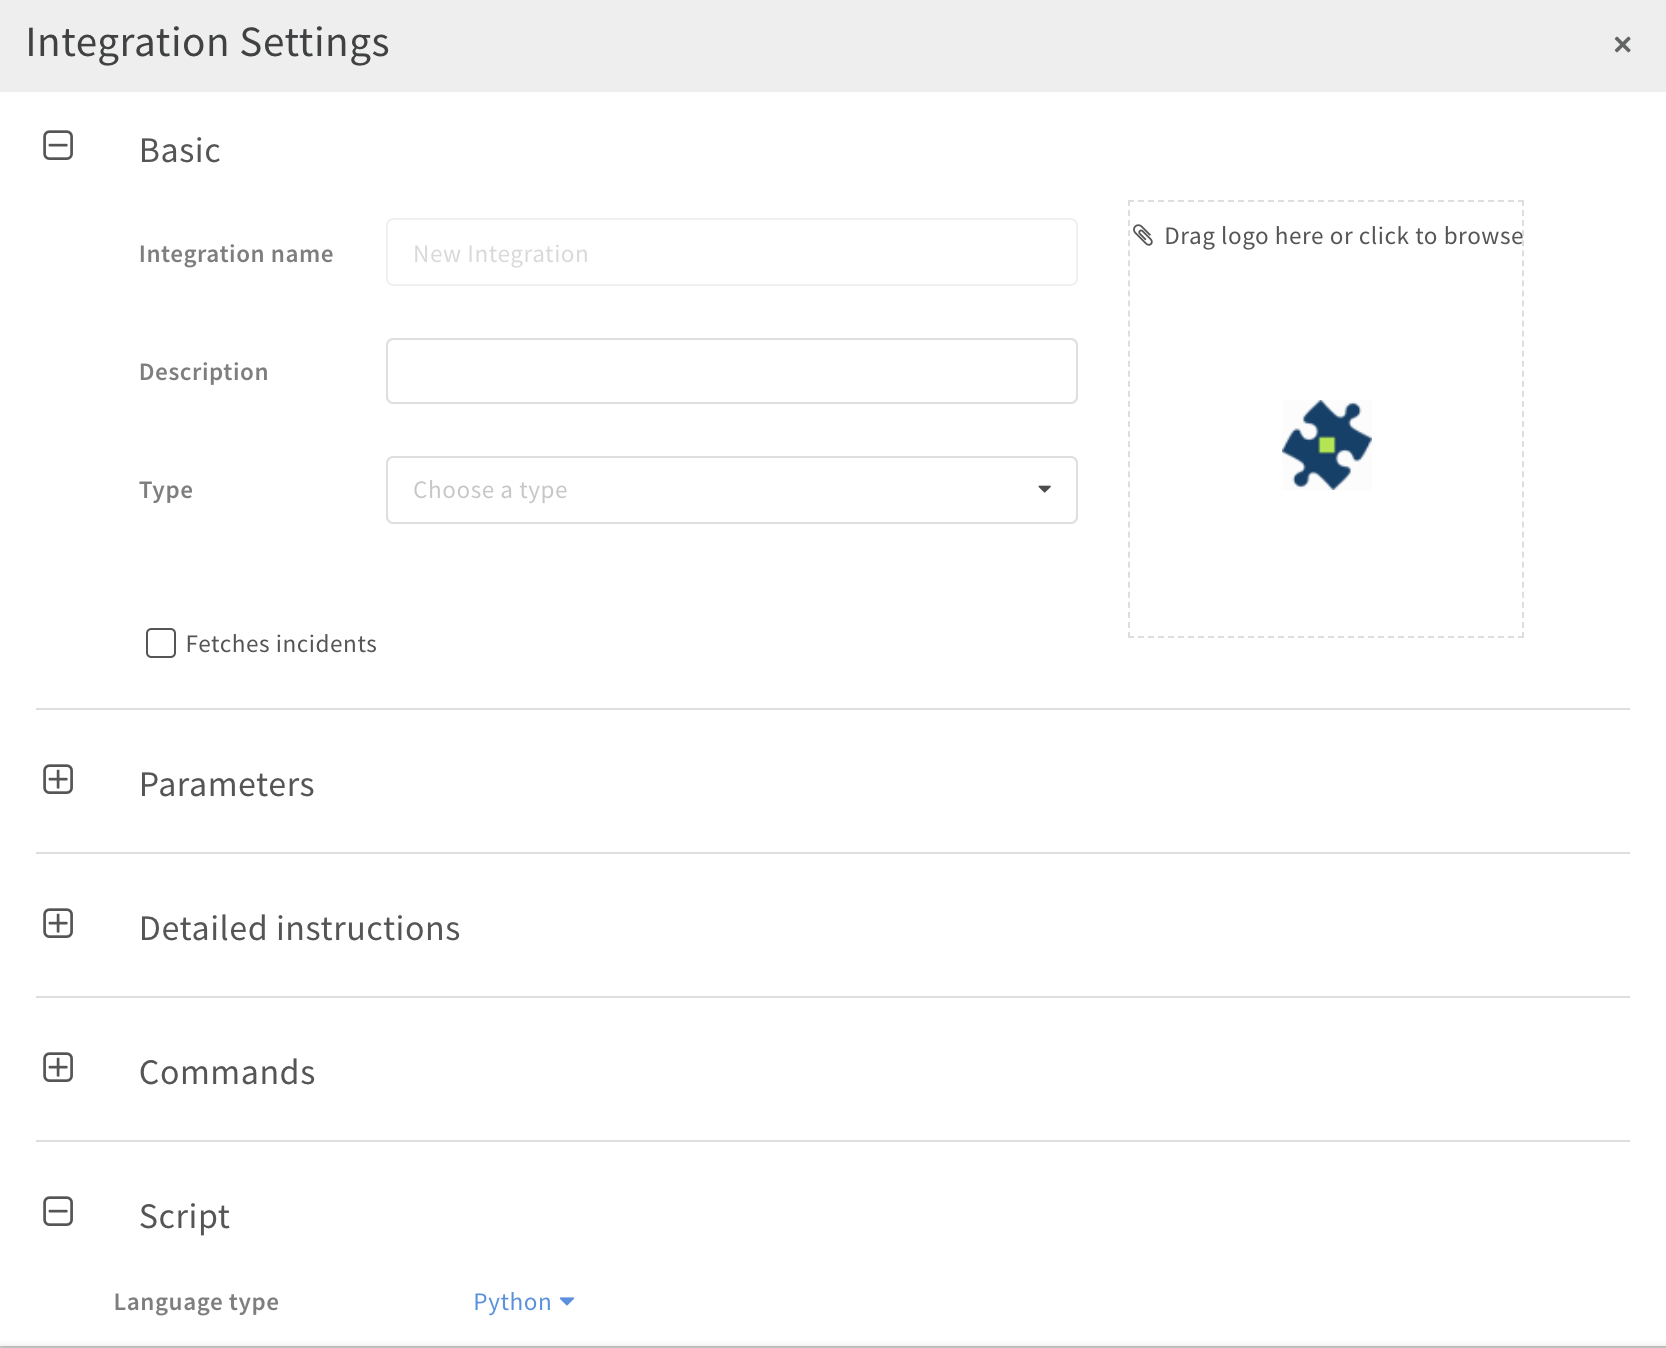
Basic Settings#
In the basic settings menu, is where we give an integration the following:
- Integration Name - This is what the display name will be for the integration.
- Description - This is a basic description of what the integration does and displays in the integration menu.
- Type - Denotes what type of integration we are building. Please note: This setting is required.
- Fetches Incidents - If the integration pulls events periodically, we must have this setting enabled.
Parameters#
Parameters are fields which are required for the integration to function properly. This is where we configure a proxy, set API keys, as well as set other global variables for the integration. Parameters have the following configurable settings:
- Parameter Name - This is the name of the variable we will use in our integration. Please note that these names need to follow standard python/JS naming conventions.
- Select Type - The type of variable being used.
- Mandatory - The parameter is required in order for the integration to operate.
- Initial Value - The default value for the given parameter.
- Display Name - This is the name for the parameter that will be visible in the menu to create an instance.
Add additional parameters with the (+) symbol at the bottom of the menu.
Detailed Instructions#
Use this section to include a "How to" for the integration as well as some common troubleshooting steps. These instructions need to help the user to configure the instance/connection. If there are special user permissions that are required, or the user needs to create an api key, or if a special port need to be configured. Additionally, it is advised to link to the original product's documentation. This section supports markdown.
Commands#
The Command menu consists of the command name and details, as well as Arguments, Outputs, and Important.
- Command Name - The name given for the command. Is used by entering
!command-namein the command-line. - Potentially Harmful - Use this to indicate that the command runs scripts that my be seen as harmful.
- Description - Seen in the command-line, the description should include an example of how the command is executed, as well as a brief summary of what the command does.
Arguments#
Arguments are variables for a command that are dynamic and can be changed each time the command is executed. For example !test-command query="This is an example" Shows "query" as an argument for the command "test-command". The configurable fields for arguments are listed below:
- Argument - The name used for the argument and should follow Python/JS naming conventions.
- Mandatory - If the argument is required, tick this checkbox.
- Default - When enabled, the command will always use this argument with its default setting, unless changed.
- Description - A brief description of the argument. Should also include an example.
- Is Array - Indicates that the argument is an array of variables.
- List Options - Add options separated by a comma to include a dropdown list of options for the argument.
Outputs#
Please read here to learn more about Outputs and Context.
Keyboard Shortcuts#
Some useful keyboard shortcuts supported in the IDE:
Selection#
| Action | Windows/Linux | Mac |
|---|---|---|
| Select all | Ctrl-A | Command-A |
| Select left | Shift-Left | Shift-Left |
| Select right | Shift-Right | Shift-Right |
Go To#
| Action | Windows/Linux | Mac |
|---|---|---|
| Go to start | Ctrl-Home | Command-Home, Command-Up |
| Go to end | Ctrl-End | Command-End, Command-Down |
Find/Replace#
| Action | Windows/Linux | Mac |
|---|---|---|
| Find | Ctrl-F | Command-F |
| Replace | Ctrl-H | Command-Option-F |
| Find next | Ctrl-K | Command-G |
| Find previous | Ctrl-Shift-K | Command-Shift-G |
Folding#
| Action | Windows/Linux | Mac |
|---|---|---|
| Fold selection | Alt-L, Ctrl-F1 | Command-Option-L, Command-F1 |
| Unfold | Alt-Shift-L, Ctrl-Shift-F1 | Command-Option-Shift-L, Command-Shift-F1 |
| Fold all | Alt-0 | Command-Option-0 |
| Unfold all | Alt-Shift-0 | Command-Option-Shift-0 |
Other#
| Action | Windows/Linux | Mac |
|---|---|---|
| Indent | Tab | Tab |
| Outdent | Shift-Tab | Shift-Tab |
| Undo | Ctrl-Z | Command-Z |
| Redo | Ctrl-Shift-Z, Ctrl-Y | Command-Shift-Z, Command-Y |
| Toggle comment | Ctrl-/ | Command-/ |